Display problems
Non-ASCII characters can’t be displayed
When running the SimulRPi.run_examples script or using the
SimulRPi.GPIO module in your own code, your terminal might have
difficulties printing the default LED symbols based on special characters:
UnicodeEncodeError: 'ascii' codec can't encode character '\U0001f6d1' in position 2: ordinal not in range(128)
This is mainly a problem with your locale settings used by your terminal.
Solution #1: change your locale settings (best solution)
The best solution consists in fixing your locale settings since it is permanent and you don’t have to change any Python code.
Append
~/.bashrcor~/.bash_profilewith:export LANG="en_US.UTF-8" export LANGUAGE="en_US:en"
You should provide your own UTF-8 based locale settings. The example uses the English (US) locale with the encoding UTF-8. The
locale -acommand gives you all the available locales on your Linux or Unix-like system.Reload the
.bashrc:$ source .bashrc
3. Run the locale command to make sure that your locale settings were set
correctly:
$ locale

LANG="en_US.UTF-8"
LC_COLLATE="en_US.UTF-8"
LC_CTYPE="en_US.UTF-8"
LC_MESSAGES="en_US.UTF-8"
LC_MONETARY="en_US.UTF-8"
LC_NUMERIC="en_US.UTF-8"
LC_TIME="en_US.UTF-8"
LC_ALL=
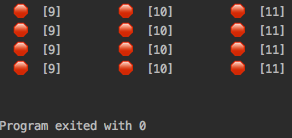
Run the
SimulRPi.run_examplesscript to test if you can display the LED symbols fine using the correct encoding UTF-8:$ run_examples -s -e 1
Output:

See also
How to Set Locales (i18n) On a Linux or Unix: detailed article
How can I change the locale?: from raspberrypi.stackexchange.com, provides answers to set the locale user and system-wide
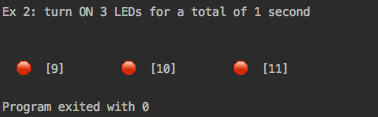
Solution #2: export PYTHONIOENCODING=utf8 (temporary solution)
Before running the SimulRPi.run_examples script, export the
environment variable PYTHONIOENCODING with the correct encoding:
$ export PYTHONIOENCODING=utf8
$ run_examples -s -e 1
Output:
However, this is not a permanent solution because if you use another
terminal, you will have to export PYTHONIOENCODING again before running
the script.
Use ASCII-based LED symbols
If you tried the previous two solutions, and you still can’t display the LED symbols that use special characters (UTF-8 encoding), you can instead opt for ASCII-based LED symbols.
Method #1: use the SimulRPi.GPIO API
If you are using the SimulRPi.GPIO module in your code, you can change
the default LED symbols used by all output channels with the function
setdefaultsymbols(). Hence, you can provide your own
ASCII-based LED symbols using ANSI codes to color them:
   import time
   import SimulRPi.GPIO as GPIO

   GPIO.setdefaultsymbols(
      {
          'ON': '\033[91m(0)\033[0m',
          'OFF': '(0)'
      }
   )
   led_channel = 11
   GPIO.setmode(GPIO.BCM)
   GPIO.setup(led_channel, GPIO.OUT)
   GPIO.output(led_channel, GPIO.HIGH)
   GPIO.cleanup()
Or you can provide the argument "default_ascii" to the function
setdefaultsymbols() which will provide default ASCII-based
LED symbols for you:
GPIO.setdefaultsymbols("default_ascii")
Output:

Note
If working with the Darth-Vader-RPi library, you can use ASCII LED
symbols when running the start_dv script by assigning the value
“default_ascii” to the default_led_symbols setting in the
main configuration file:
"default_led_symbols": "default_ascii",
See also
Build your own Command Line with ANSI escape codes : more info about using ANSI escape codes (e.g. color text, move the cursor up)
How to print colored text in Python? : from stackoverflow, lots of Python examples using built-in modules or third-party libraries to color text in the terminal.
Method #2: use the command-line option -a
When running the SimulRPi.run_examples script, you can use the
command-line option -a which will make use of ASCII-based LED symbols:
$ run_examples -s -e -1 -a
Output:

Multiple lines of LED symbols
When running the SimulRPi.run_examples script, if you get the following:
It means that you are running the script within a too small terminal window, less than the length of a displayed line.
Solution: enlarge the window
The solution is to simply enlarge your terminal window a little bit:
Technical explanation: the script is supposed to display the LEDs turning ON and OFF always on the same line. That is, when a line of LEDs is displayed, the script goes to the beginning of the line to display the next state of LEDs by printing over the previous LEDs.
However, when the window is too small, the first line of LEDs that gets printed overflows on the second line since there is not enough space to print everything on the first line. Then, the script won’t be able to overwrite the first line of LEDs because it will be positioned on the second line instead. So you get this display of multiple lines of LEDs.